A garage door company in Warwick, RI, often gets calls about how to reset garage door opener issues from frustrated homeowners. Many people face problems with their garage door openers at some point.
This guide walks you through the most common troubleshooting steps. You’ll learn about power cycling, battery replacement, remote control fixes, and sensor problems. These simple techniques can save you time and money on repair calls.
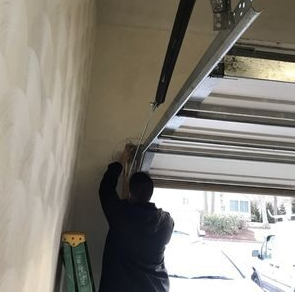
Power Cycle the Garage Door Opener
Start by power cycling your garage door opener to reset the system and fix basic issues. Find the power cord connected to the opener motor and unplug it from the wall outlet.
Wait about 30 seconds so all parts can fully reset. Plug the power cord back in and watch how the opener responds.
If it still doesn’t work, check your circuit breaker to make sure it hasn’t tripped. Also, look at the power outlet for damage or loose connections. This simple reset often fixes minor problems quickly.
Check and Replace Batteries
Look at the battery compartment of your remote control for corrosion or weak batteries. Corrosion blocks electrical connections and causes problems.
If you see corrosion, clean it carefully with a small brush or cloth dipped in vinegar. Make sure batteries are inserted correctly with the right polarity. Weak batteries cause strange behavior in garage door openers.
Replace old batteries with fresh ones of the same type. Use good-quality alkaline batteries for the best results. Regular battery checks keep your opener working smoothly.
Reset the Remote Control
Fix remote control problems by resetting the connection between your remote and opener. Find the ‘Learn’ button on the opener unit near the antenna. Press and hold this button until the light turns on, then let go. Press the button you want to use on your remote within 30 seconds.
The opener light should flash to show successful programming. Test your remote to make sure it works with the garage door. If problems continue, check that your remote has fresh batteries and you’re close enough to the opener.
Adjust the Limit Settings
Use the adjustment screws on your garage door opener to fix how far the door opens and closes. Turn the ‘open’ screw clockwise to make the door go higher or counterclockwise to make it stop lower. Use the ‘close’ screw the same way to adjust the closing position.
Make small changes and test the door after each adjustment. The door should move smoothly without stopping or jerking. Keep adjusting until the door reaches the right position. Check your owner’s manual for specific instructions about your model.
Inspect and Replace Sensors
Check the sensors that keep your garage door safe by detecting objects in the door’s path. Look at sensor alignment and cleanliness first since misaligned or dirty sensors cause malfunctions. Use a level to check proper alignment and a soft cloth to clean off dirt or debris.
If sensors still don’t work after cleaning and aligning, you may need to replace them. Follow manufacturer guidelines for compatible replacements and installation instructions to restore proper operation.
Consult the Owner’s Manual
Your owner’s manual contains specific information about your garage door opener model. It includes wiring diagrams, programming steps, troubleshooting charts, and safety information.
Use the table of contents to find what you need quickly. Pay attention to warnings and notes from the manufacturer. The manual may also have contact information for customer support if you need extra help.
Related Topics:
Leave a Reply