Author: admin

  • How to Open a Garage Door With a Broken Spring

    How to Open a Garage Door With a Broken Spring

    The way I handle it is slowly and carefully. You grab the handle, keep your back straight, and lift with your legs. It’s heavier than you might expect because the spring isn’t doing any of the work. You’ve got to take your time, maybe even pause halfway if it’s tiring. Once it’s up, clamp it in place so it won’t drift down. A steady hand and patience go a long way here; rushing makes it riskier, trust me.

    Even when it’s secured, don’t stand under it, and watch for anything along the tracks that might get in the way. It’s easy to overlook little things, but they can make a big difference. The goal is to get it open safely and keep it stable until someone who really knows springs can fix it properly.


    Safety Precautions

    Before touching anything, unplug the automatic opener. That way, you don’t have to worry about the door moving on its own. Then use a clamp or vise grip to lock it in place. It won’t budge, which is a relief.

    Gloves and goggles are not optional here. I’ve seen people get scraped or cut, and it’s just not worth it. Clear the area too; don’t let anyone walk under or near the door while you’re lifting. It’s kind of a big deal, but simple to handle if you just set up the space right.

    Take it slow. There’s tension in that spring that you can’t always see, so moving carefully is the only safe way.


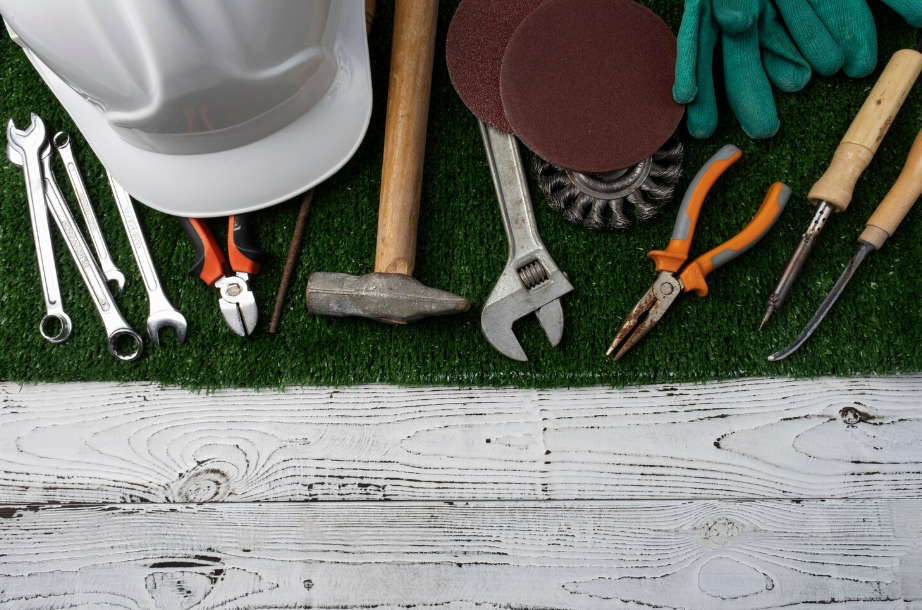
    Gather Necessary Tools

    You’ll want a ladder, gloves, a flashlight if it’s dark, and a set of pliers or vice grips for the emergency release cord. A C-clamp or locking pliers will hold the door in place once it’s up.

    Having someone there is really helpful, even just for passing tools or spotting you. It makes the whole process less nerve-wracking. Being prepared with everything in reach keeps you from fumbling mid-lift.


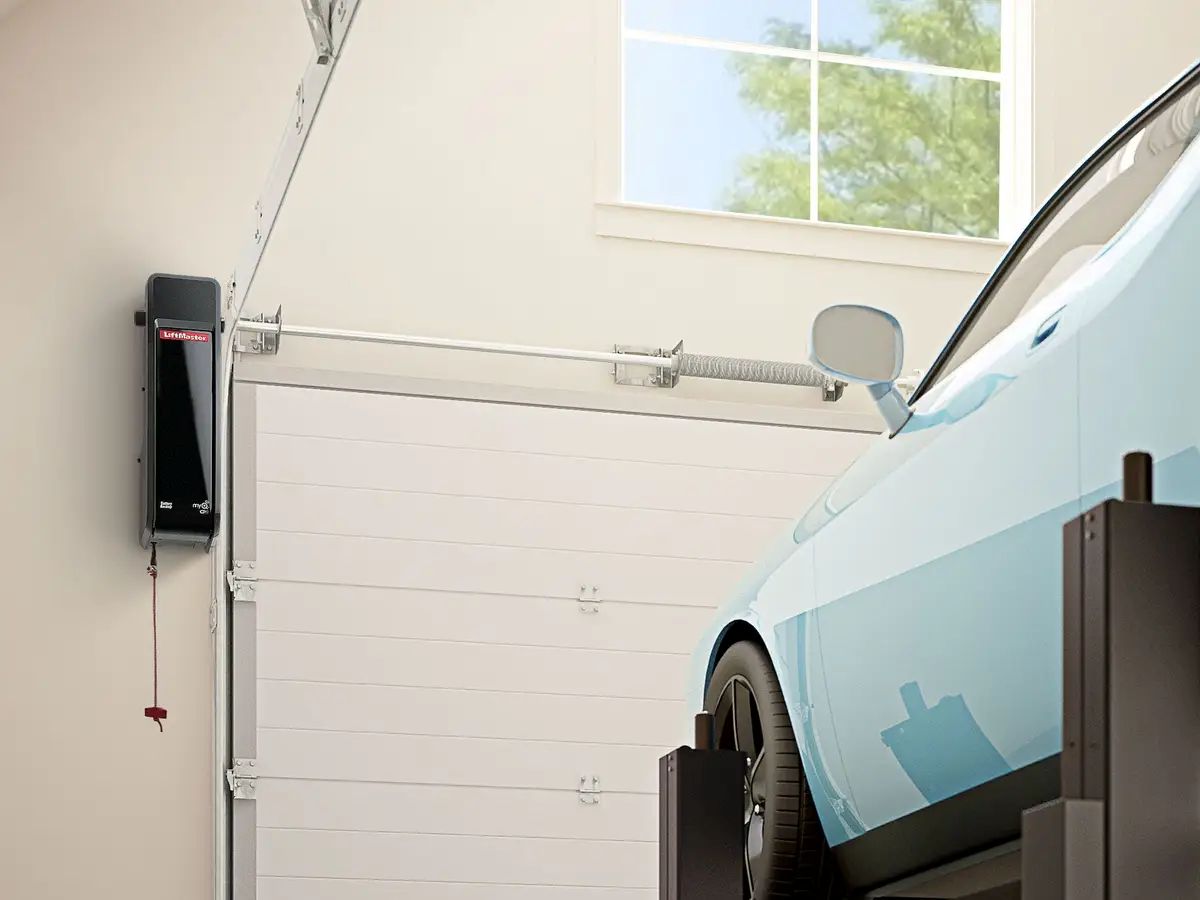
    Release the Emergency Release Cord

    Look for the red cord near the motor unit. Pull it down until you hear it click. That lets you disconnect the door from the opener and work manually.

    Make sure the door is closed before doing this. If it’s not, things can get unpredictable really fast. Once it’s free, you can lift it slowly, but keep in mind it’s going to feel heavier than usual.

    Check the track and area for any obstacles while you’re at it. Little things on the floor or track can cause a snag.


    Lift the Door Manually

    Grab the handle and start lifting with your legs, not your back. Keep it balanced and move slowly. It’s a bit of effort, but it’s manageable if you take your time.

    Watch the edges and tracks. Make sure it isn’t catching anywhere. Once it’s up where you need it, stop and check stability before letting go. Secure it with a clamp or vise grip.


    Secure the Door in Place

    Place a clamp on the track under the bottom roller. Tighten it so the door won’t move. Gently test it by nudging the door. Adjust if it slips at all.

    Make sure no one is standing underneath while it’s clamped. Safety first, even if it feels tedious.


    Call for Professional Repair

    Replacing a broken spring isn’t really something to do on your own. It’s tense, it’s heavy, and it can hurt you if you misjudge it. Calling a licensed garage door company takes the stress off.

    They can figure out the right spring, install it safely, and make sure everything else is working fine. It’s worth it to have a pro do it; they know what to check and what to replace so that the door won’t give you trouble again.

    It’s easy to panic when a spring breaks, but if you follow these steps slowly and then let a professional handle the repair, your door will be back in shape without anyone getting hurt.


    Related Topics:

  • How to Safely and Correctly Replace Garage Door Rollers

    How to Safely and Correctly Replace Garage Door Rollers

    We will cover the tools you need, how to remove worn rollers, and how to install new ones the right way. The goal is simple. Keep your garage door moving smoothly and safely without creating more problems in the process.


    Safety Precautions

    Before you start working on the rollers, pause for a second and think about safety. Garage doors are heavy, and even a small mistake can cause injury. Disconnect the opener first so the door does not move unexpectedly while you are working.

    Once the opener is unplugged, secure the door in place using locking pliers or C clamps on the track. This keeps it from sliding down while you remove parts. Wear gloves and safety glasses too. It might feel like overdoing it, but sharp edges and loose hardware can catch you off guard.

    Clear the area around the garage door so you have enough space to move around. If possible, ask someone to stay nearby. They can hold the ladder, pass tools, or keep an eye on things. It just makes the whole job feel more controlled.


    Tools and Materials Needed

    Having the right tools ready saves you from running back and forth mid-project. You will need replacement rollers that match your door type, along with a wrench or socket set to loosen and tighten bolts. A ladder helps you reach the upper tracks safely.

    Keep lubricant spray on hand as well. A silicone-based product works well for garage door parts. Gloves and safety glasses should already be part of your setup, and locking pliers or C clamps are necessary to keep the door secure.

    It is tempting to improvise with whatever tools you have lying around. Try not to. Using the proper tools makes the process smoother and reduces the chance of stripped bolts or loose fittings.


    Removing Old Rollers

    Start with the door fully closed and secured in place. Double-check the clamps before touching any hardware. Once everything feels stable, use your socket wrench to loosen the bolts that hold the hinge and roller assembly.

    Carefully slide the roller out of the track as you remove the hinge. Do this one at a time so the door stays aligned. The bottom rollers can be under more tension, so move slowly and stay aware of how the door shifts.

    Take a close look at the old rollers once they are out. Cracks, flat spots, or bent stems are common signs of wear. Dispose of them properly and keep your workspace tidy. It sounds minor, but a clean area helps you stay focused.


    Installing New Rollers

    With the old rollers removed, position the new rollers into the track the same way the previous ones were installed. Attach the hinge back in place and tighten the bolts securely. They should feel firm but not overly tight.

    Work your way along the door panel by panel. Keep checking that the track stays aligned as you go. If something feels off, stop and adjust it before moving on. Small corrections now can prevent bigger repairs later.

    Once all rollers are installed, remove the clamps carefully. Reconnect the opener only after you are sure everything is secure. Taking that extra minute to double-check is worth it.


    Testing Garage Door Operation

    Now it is time to test the door. Open and close it manually a few times before using the opener. The movement should feel smooth and steady, without jerking or sticking.

    Listen closely for unusual sounds. Grinding or squeaking could mean a roller is not seated properly. If the door seems unbalanced, disconnect the opener and lift it halfway. It should stay in place without drifting up or down.

    After manual testing, reconnect the opener and run a full cycle. Watch how the door travels along the tracks. If anything seems unusual, pause and inspect the rollers again.


    Maintenance Tips

    Routine maintenance keeps your new rollers in good shape. Every few months, check them for cracks, bending, or signs of wear. A quick inspection does not take long, and it helps you catch problems early.

    Apply lubricant to the rollers, hinges, and springs periodically. This reduces friction and keeps everything moving quietly. Tighten any loose bolts you notice along the way.

    Also, keep the tracks clean. Dust, leaves, and small debris can build up over time and interfere with smooth operation. A simple wipe down now and then can make a noticeable difference. Your garage door will run more smoothly, and you will probably avoid unnecessary repairs.


    Related Topics:

  • What Is The Difference Between Commercial And Residential Garage Doors

    What Is The Difference Between Commercial And Residential Garage Doors

    Commercial garage doors are built larger and more durable. They handle frequent use, heavier loads, and larger vehicles, so they are usually made from reinforced steel or aluminum. In contrast, residential garage doors are smaller and designed more with appearance in mind, since curb appeal matters to homeowners.

    Operation and overall purpose set them apart, too. Commercial systems are built for constant cycling and may include heavy-duty openers and backup power. Residential doors focus more on smooth, quiet performance for daily household use, which is really what most homeowners care about.


    Size and Weight Capacity

    When comparing commercial and residential garage doors, their differences in size and weight capacity are significant. Commercial garage doors are designed to accommodate much larger vehicles and industrial equipment, which means they can be many times the length and width of the average residential garage door. The door can’t be heavier than the supports around it, so commercial installations require robust structural frameworks to handle these massive panels.

    Commercial doors are built for frequent openings and closings throughout the day, often handling delivery trucks, forklifts, and other heavy machinery. They are constructed with heavy-duty materials such as steel or aluminum to withstand constant use and provide enhanced security. In contrast, residential garage doors are smaller and have a lower weight capacity since they are usually used less frequently and for smaller vehicles like cars or motorcycles. These doors are commonly made of lighter materials such as wood or fiberglass to cater to the needs of residential properties.


    Material and Durability

    Commercial and residential garage doors differ significantly in the materials used and their longevity. Commercial doors are built using heavy-duty materials such as steel, aluminum, or fiberglass to withstand frequent use and harsh conditions. These materials offer superior strength and durability compared to the lighter materials typically used in residential doors, like wood, vinyl, or insulated steel. 

    Commercial doors are designed to endure high traffic volumes, making them more resistant to dents, warping, and corrosion. They often feature thicker panels and robust hardware to enhance their lifespan. 

    On the other hand, residential doors prioritize aesthetics and insulation, sacrificing some durability. Understanding the material differences between commercial and residential garage doors is essential in selecting the most suitable option for your specific needs.


    Security Features

    Security features play an essential role in distinguishing between commercial and residential garage doors, ensuring the protection of valuable assets and property. When comparing the two types, here are the key differences to consider:

    1. Access Control Systems: Commercial garage doors often feature advanced access control systems like keycard readers or biometric scanners, providing heightened security measures.
    2. Heavy-Duty Locking Mechanisms: Commercial doors are equipped with heavy-duty locks and bolts that offer increased resistance to forced entry attempts.
    3. Security Cameras: Many commercial garage doors come with integrated security camera systems for constant monitoring and surveillance.
    4. Alarm Systems: Commercial doors commonly have alarm systems that trigger alerts in case of unauthorized access, adding an extra layer of security to the premises.


    Design and Style Options

    Design and style options for garage doors encompass a wide variety of aesthetic choices that cater to different preferences and architectural styles. From traditional carriage house designs to modern flush panel doors, the range is vast. Materials like steel, aluminum, wood, and fiberglass offer different looks and levels of durability. Window inserts can add decorative flair and natural light.

    Hardware options such as handles, hinges, and decorative accents contribute to the overall aesthetic. Color choices are plentiful, allowing customization to match or complement the home’s exterior. Some designs feature insulation for energy efficiency and noise reduction. Understanding these options is essential in selecting a garage door that not only enhances the property’s curb appeal but also suits functional requirements.


    Operation and Automation

    When operating a garage door, it is important to look into the automation options available for convenience and efficiency. Here are some key considerations for automation:

    1. Remote Control Access: Allows the garage door to be opened and closed from a distance, providing convenience and security.
    2. Wi-Fi Connectivity: Enables integration with smart home systems for remote monitoring and control via smartphones or voice commands.
    3. Safety Sensors: Essential for detecting obstructions or objects in the door’s path, ensuring safe operation.
    4. Battery Backup: Offers peace of mind during power outages, allowing the door to function normally without electricity.

    Understanding these automation features can enhance the functionality and usability of garage doors for both residential and commercial settings.


    Cost and Maintenance Differences

    Cost and maintenance disparities between commercial and residential garage doors can be significant due to varying factors such as size, material, and usage frequency. Commercial garage doors are generally larger and made of heavier-duty materials to withstand frequent openings and closings. This results in higher upfront costs for commercial doors compared to residential ones. Maintenance costs also differ; commercial doors require more frequent inspections and servicing due to their usage patterns, leading to higher maintenance expenses over time. 

    Residential garage doors, being smaller and typically made of lighter materials, are generally more cost-effective to install and maintain. Understanding these cost and maintenance variations is essential for making informed decisions when choosing between commercial and residential garage doors.


    Contact Us

    At Patriots Overhead LLC, we’re committed to providing fast, reliable garage door services across Rhode Island and the Greater Boston area. Whether you need emergency repairs, a new installation, or routine maintenance, our team is here to help.

    Office Location: 927 W Shore Rd, Warwick, RI 02889 

    Phone: (401) 365-5178

    Hours of Operation:

    • Monday–Friday: Open 24 hours
    • Saturday: 9:00 AM – 5:00 PM
    • Sunday: Closed

    Email: Available upon request

    Stay Connected: Sign up for updates, special offers, and helpful info via text. Opt-in anytime and opt-out whenever you choose.


    Related Topics:

  • How Long Do Garage Door Opener Batteries Last

    How Long Do Garage Door Opener Batteries Last

    Your garage door opener battery won’t last forever, and knowing when it needs replacing can save you from getting stuck with a door that won’t budge. A reliable garage door team can help you understand battery maintenance, but it’s good to know the basics yourself. This post covers how long these batteries typically last, what factors affect their lifespan, and the warning signs that indicate it’s time for a new one. We’ll also share tips to get the most life out of your battery and why regular upkeep matters. Plus, we’ll touch on how to properly recycle old batteries when you’re done with them.

    Average Lifespan of Garage Door Opener Batteries

    Most garage door opener batteries last between 3 and 5 years before you’ll need to replace them. How long yours lasts depends on how often you use it, the temperature swings in your garage, and the quality of the battery. Regular maintenance can stretch that lifespan a bit further. Pay attention to how the battery performs if it drains faster than usual or the door operates sluggishly; that’s your cue. When it’s time for a replacement, make sure the new battery works with your specific opener model. Being proactive about replacement helps you avoid the hassle of a dead battery catching you off guard.

    Factors Affecting Battery Longevity

    A few key factors determine how long your garage door opener battery will last: how often you use it, temperature changes, and the battery’s build quality. Opening and closing the door frequently means more recharging cycles, which wear out the battery faster. Temperature plays a big role, too; extreme heat or cold can accelerate battery degradation beyond normal conditions. The quality of the battery matters as well. Higher-quality batteries with better materials typically outlast cheaper options. Knowing what affects battery life helps you make smarter choices about usage and maintenance.

    Signs Your Battery Needs Replacement

    Catching the warning signs early keeps your garage door running smoothly. Here are four indicators that your battery needs replacing:

    • Diminished Performance: Slower response times or weaker door operation often point to a failing battery.
    • Frequent Recharging: If you’re recharging more often than usual, the battery’s capacity is dropping.
    • Low Voltage Warnings: Constant low-voltage alerts on your opener’s display indicate the battery can’t hold a charge like it used to.
    • Audible Alarms: Beeping sounds or repeated alerts from the opener usually signal a battery nearing the end of its life.

    Tips to Extend Battery Life

    Getting the most out of your garage door opener battery comes down to good maintenance habits. Keep the battery fully charged to maintain solid performance. Check the terminals regularly for corrosion and clean them off if you spot any buildup. This keeps the connection strong. Store or position the battery away from extreme temperatures since both intense heat and cold can shorten its lifespan. Only use the garage door opener when you actually need to, which conserves battery power over time. A high-quality battery charger can also help maintain the battery’s long-term health.

    Importance of Regular Maintenance

    Consistent upkeep keeps your garage door opener battery performing at its best. Here’s what to stay on top of:

    • Regular Inspections: Look for corrosion or wear on the battery terminals.
    • Clean Connections: Wipe down terminals with a baking soda and water mix to keep connections secure.
    • Tighten Loose Parts: Keep all opener components snug to avoid putting extra strain on the battery.
    • Lubricate Moving Parts: Apply lubricant to reduce friction and extend the system’s overall life.

    Recycling Old Batteries

    When your battery finally dies, don’t just toss it in the trash. Lead-acid batteries, the type commonly found in garage door openers, contain toxic substances like lead and sulfuric acid that can harm the environment. Recycling facilities extract reusable materials from these batteries, reducing waste and conserving resources. Many hardware stores, recycling centers, and local government facilities accept old batteries. Taking a few minutes to recycle helps keep harmful chemicals out of landfills and supports responsible waste management. Every battery you recycle is a small step toward a cleaner environment.


    Related Topics:

  • Smart Garage Door Openers Vs Traditional: Which Is Right for You

    Smart Garage Door Openers Vs Traditional: Which Is Right for You

    Choosing between a smart garage door opener and a traditional one comes down to your lifestyle and how comfortable you are with technology. Both options have their strengths, and expert garage door services can help you determine which setup best suits your home. This post breaks down the key differences in features, installation, remote access, safety, and smart home integration. We’ll also cover the costs involved and what you actually get for your money over time. By the end, you’ll have a clearer picture of which garage door opener makes sense for your situation.

    Smart Garage Door Opener Features

    Smart garage door openers come loaded with features that make daily life easier and keep your home more secure. Most models connect to your smartphone, so you can check on your garage door and control it from anywhere. You also get perks like automatic closing, motion-activated lights, and compatibility with voice assistants like Amazon Alexa or Google Assistant. Security features like rolling-code technology help keep hackers and intruders out, while battery backups ensure your opener continues to work during power outages. Some models even send real-time alerts to your phone whenever the garage door opens or closes.

    Installation Process Comparison

    Installing a smart garage door opener requires more steps than installing a traditional one. Smart openers require additional components, such as sensors and Wi-Fi connectivity, and integration with your home’s smart system. Traditional openers are more straightforward: you mount the mechanism, connect the power, and set the open/close limits. With smart openers, you’ll need to configure Wi-Fi, download apps, and sometimes link everything to your existing smart home setup. Software updates may pop up from time to time to keep things running smoothly. Knowing these differences helps you decide based on how comfortable you are with tech.

    Remote Access and Control

    Remote access lets you control your garage door from anywhere, adding both convenience and security to your daily routine. Smart openers give you way more options here than traditional models. You can open or close the door through a smartphone app, no matter where you are. Many smart openers also pair with voice assistants like Alexa or Google Assistant, so you can operate the door hands-free. Real-time notifications keep you updated on your garage door’s status and let you track who’s coming and going.

    Security and Safety Features

    Safety and security matter when it comes to protecting your home and family. Smart garage door openers offer features like rolling-code technology, which generates a new code every time you use the door. This stops thieves from copying your signal. Many models include motion sensors that pause the door if something’s in the way as it closes. Some openers even have built-in cameras so you can watch what’s happening in your garage in real time. Traditional openers usually don’t have these advanced features, which can leave them more open to break-ins. If security ranks high on your list, smart openers offer better protection.

    Integration With Smart Home Systems

    Smart garage door openers connect easily with most smart home systems, giving you more control over your entire setup. You can link your opener to Google Home, Amazon Alexa, or Apple HomeKit and include it in routines or scenes. This means you could set your garage to close automatically when you arm your security system at night. Some smart openers also keep activity logs and send alerts, so you know exactly who opened the garage and when. This kind of integration makes your home run smoother and adds another layer of security to your daily life.

    Cost Analysis and Long-Term Benefits

    Smart garage door openers cost more upfront than traditional models, but the long-term benefits often make up for the higher price. The extra features, remote access, real-time alerts, and smart home integration, add convenience and peace of mind that’s hard to put a price on. Automation can also save energy, since the door stays open only when needed. Over time, the efficiency and added functions of a smart opener can lead to savings and less worry about home security. For homeowners who want a fully connected home, the investment pays off.


    Related Topics:

  • Do Garage Door Openers Work When Power Is Out? Your Complete Emergency Guide

    Do Garage Door Openers Work When Power Is Out? Your Complete Emergency Guide

    Garage door openers rely on electrical power for automated operation, but most models include emergency release mechanisms that enable manual functionality during outages. Modern residential garage door systems feature backup options and manual override capabilities that homeowners can activate when standard electric operation fails. Professional installation typically includes emergency release cords and safety features designed for power loss scenarios.

    Since there’s no electricity, a garage door opener without a battery backup won’t work after a power outage. If you’ve pulled into your driveway and realize you can’t get into the house, or you’re trapped inside with no way to get your car out of the garage, when your door won’t open or close, it becomes a significant problem that may require assistance from Warwick’s best garage door company.

    Understanding Your Options During Power Loss

    Most garage door openers stop functioning automatically when electricity cuts out. The motor that drives your door up and down needs a consistent power supply to operate the lifting mechanism. However, manufacturers build in solutions specifically for these situations.

    Battery backup units represent the most seamless option for maintaining automated operation. These systems charge continuously while power flows normally, then switch over automatically during outages. Quality battery backups typically provide 10-15 opening cycles, depending on door weight and usage patterns.

    Manual operation becomes your fallback when battery systems aren’t installed or have depleted their charge. Every garage door opener includes an emergency release cord, usually a red handle hanging from the opener track mechanism. This cord disengages the motor from the door assembly, allowing you to lift and lower the door by hand.

    Step-by-Step Manual Operation Process

    Locate the emergency release cord hanging from your opener’s trolley system. Pull this cord straight down with steady pressure until you hear the mechanism disengage. You’ll notice the door feels different now – heavier and completely disconnected from the motor system.

    Grip the door handle with both hands and lift slowly. Garage doors are surprisingly heavy, typically weighing 150-250 pounds depending on material and size. If the door feels extremely heavy or won’t budge, your spring system may need professional attention. Properly balanced doors should lift relatively easily once disengaged.

    When closing manually, lower the door carefully while watching for obstacles. Never let the door slam down, as this can damage tracks, rollers, or the door panels themselves.

    Reconnecting After Power Returns

    Re-engaging your opener requires pulling the emergency release cord toward the motor unit, which reconnects the trolley to the drive mechanism. Some models require you to operate the door opener once to fully reset the connection. Test the automatic operation a few times to confirm everything works properly.

    Timing matters here. Don’t attempt to reconnect while the door is partially open, as this can cause alignment issues or damage the opener mechanism.

    Battery Backup System Benefits

    Professional-grade battery backup units integrate directly into your existing opener system. These units continuously monitor power status and switch to battery mode within seconds of detecting an outage. Installation typically requires professional service to ensure proper wiring and configuration.

    Quality backup systems include LED indicators showing battery status and charge levels. Many models also feature smartphone connectivity, alerting you when the battery level drops or when the system switches to backup mode.

    Consider your usage patterns when evaluating backup options. Frequent travelers or areas with regular power issues benefit most from these systems. The initial investment often pays for itself in convenience and security during the first major outage.

    Safety Considerations for Manual Operation

    Never attempt manual operation if your door appears damaged or if the springs look broken or stretched. Garage door springs contain tremendous tension and can cause serious injury if they fail during manual operation. Call a professional service immediately if you notice spring issues.

    Keep children and pets away from the door area during manual operation. The disconnected door moves differently from automated operation, and unexpected weight shifts can occur.

    Check that your garage door opener is unplugged or switched off before beginning manual operation. This prevents accidental activation while you’re manually handling the door.

    Common Troubleshooting Issues

    Remote control problems often coincide with power outages, especially if your opener includes smart features or WiFi connectivity. These systems may need to be reset once power returns, which typically involves holding specific button combinations on your remote or wall panel.

    Sensor misalignment can prevent normal operation even after power restoration. Check that the photo-eye sensors on either side of your door opening are clean and properly aligned with each other.

    Weather-related power outages often accompany temperature extremes, which can affect garage door operation. Cold weather can cause metal components to contract, potentially affecting door balance and smooth operation.

    Professional Maintenance Recommendations

    Annual service inspections help identify potential issues before power outages create emergencies. Professional technicians check spring tension, track alignment, and emergency release mechanisms during routine maintenance visits.

    Lubricate moving parts every six months, focusing on rollers, hinges, and track components. Use garage door-specific lubricants rather than general-purpose oils, as these are formulated for the temperature ranges and conditions your door experiences.

    Test your emergency release system monthly, even when power is working normally. This practice ensures you’re familiar with the process and helps identify mechanical issues with the release mechanism.

    Customer reviews consistently highlight the importance of knowing your emergency procedures before you need them. One homeowner review on Trustpilot emphasized how practicing the manual release process during normal conditions made a power outage situation manageable rather than stressful.

    Remember that power outages don’t have to leave you stranded. Understanding your garage door’s emergency features and maintaining the system properly keeps you prepared for whatever weather or electrical issues come your way.

    Contact Us

    At Patriots Overhead LLC, we’re committed to providing fast, reliable garage door services across Rhode Island and the Greater Boston area. Whether you need emergency repairs, a new installation, or routine maintenance, our team is here to help.

    Office Location: 927 W Shore Rd, Warwick, RI 02889

    Phone: (401) 365-5178

    Hours of Operation:

    • Monday–Friday: Open 24 hours
    • Saturday: 9:00 AM – 5:00 PM
    • Sunday: Closed

    Email: Available upon request

    Stay Connected: Sign up for updates, special offers, and helpful info via text. Opt-in anytime and opt-out whenever you choose.

    For more details or to request a quote, visit our Contact Us.


    Related Topics:

  • Common Garage Door Problems and How to Fix Them

    Common Garage Door Problems and How to Fix Them

    Garage door trouble usually shows up in simple ways. A door that suddenly gets noisy is often dealing with loose screws, tired rollers, or parts that haven’t been lubricated in a while. If it opens halfway and backs up, dirt on the sensors or a slight shift in their position is often the cause. Springs take a lot of strain and can wear out, which makes the door feel heavier than it should. Cleaning, tightening, and light lubrication can solve minor issues, but spring and cable work should be left to a trusted local garage door provider to prevent accidents and further damage.

    Noisy Garage Door

    A noisy garage door can be frustrating, but it’s usually caused by a couple of key factors. Worn-out rollers or loose hardware are the most common culprits, leading to squeaky or grinding sounds when the door opens or closes. To solve this, start by checking the rollers for any signs of wear, like cracks or flat spots. Replacing them might be necessary. Also, tighten any loose bolts, nuts, or screws on the hardware, as these can rattle and cause unwanted noise.

    Malfunctioning Sensors

    Garage door sensors are crucial for safety and proper functionality. If they start to malfunction, it can lead to problems like the door failing to close properly or reversing unexpectedly. Often, these issues are due to misaligned sensors or dirt obstructing their path. To fix this, inspect the sensors for any visible obstructions or misalignment. Cleaning the sensor eyes with a soft cloth can help, too. If the problem persists, checking the wiring connections may solve the issue. In some cases, consulting a professional technician is the best course of action.

    Broken Springs

    Broken springs are a common issue in garage door systems and can be dangerous to repair without the proper expertise. Springs bear the weight of the door, making it easier to open and close. When a spring breaks, the door may become difficult to lift or may even get stuck. These springs are under high tension, and attempting to repair or replace them yourself can be extremely dangerous. If you notice a broken spring, it’s best to contact a professional technician to handle the repair. Regular inspection and maintenance of the springs can help prevent unexpected failures.

    Rollers Going Off Track

    Rollers that go off track are a serious concern, as they can lead to jerky movements, increased noise, and even complete system failure if not addressed. Common causes of off-track rollers include wear, inadequate lubrication, or impacts from the door. If you notice uneven door movement or visible misalignment, it’s time to take action. Start by realigning the rollers, ensuring the tracks are secure, and applying lubrication to all moving parts. This can prevent further damage to the garage door system.

    Damaged Garage Door Panels

    Over time, garage door panels can become dented or cracked, which can affect the door’s performance and appearance. If you notice damage, it’s essential to assess whether the damage is localized or extends to the surrounding components. Minor dents can often be repaired, but if the damage is extensive, replacing the panels might be necessary. Matching the replacement panels to the existing ones ensures that the door looks and functions properly. Don’t wait too long to address panel damage; fixing it early can help maintain the structural integrity and longevity of your garage door.

    Remote Control Problems

    A malfunctioning remote control can be a simple yet annoying issue. If your garage door isn’t responding to the remote, there are a few quick things you can check. First, make sure the batteries are fresh and properly inserted. If the batteries are good, try reprogramming the remote. The opener’s manual will guide you through this process. Additionally, ensure the antenna on the opener motor unit is properly aligned, as this can affect signal reception. Finally, remove any obstacles near the opener that could interfere with the signal.

    Contact Us

    At Patriots Overhead LLC, we’re committed to providing fast, reliable garage door services across Rhode Island and the Greater Boston area. Whether you need emergency repairs, a new installation, or routine maintenance, our team is here to help.

    Office Location: 927 W Shore Rd, Warwick, RI 02889

    Phone: (401) 365-5178

    Hours of Operation:

    Monday–Friday: Open 24 hours

    Saturday: 9:00 AM – 5:00 PM

    Sunday: Closed

    Email: Available upon request

    Stay Connected:

    Sign up for updates, special offers, and helpful info via text. Opt-in anytime and opt-out whenever you choose.

    For more details or to request a quote, visit our Contact Us.


    Related Topics:

  • Essential Tips for Wiring a Commercial Garage Door Opener Safely

    Essential Tips for Wiring a Commercial Garage Door Opener Safely

    Wiring a commercial garage door opener isn’t something you want to wing, it can lead to electrical hazards, code violations, or a door that just doesn’t work right. Whether you’re handling the install yourself or overseeing a contractor, knowing the basics helps you spot problems before they become expensive headaches. This is one area where professional garage door services really prove their worth, but understanding the fundamentals keeps you informed either way. The right approach involves the right tools, solid electrical knowledge, and strict adherence to safety protocols.

    Proper Tools and Equipment

    Before touching a single wire, make sure your toolkit is actually up to the task. A voltage tester is non-negotiable, you need to confirm power is completely off before you start messing with anything. Wire strippers should give you clean, precise cuts without nicking the copper beneath, and wire nuts should create connections that won’t come loose over time. Grab a screwdriver set with insulated handles, because regular ones aren’t worth the risk when electricity is involved.

    You’ll also need a drill with appropriate bits for mounting, a sturdy ladder, and safety glasses because debris has a way of finding your eyes. Keep a multimeter handy for testing circuits. Cheap tools make the job harder, invest in quality equipment, and the installation goes smoother.

    Understanding Electrical Basics

    A solid grasp of electrical fundamentals separates a safe installation from a dangerous one.

    Voltage compatibility matters more than most people realize. The opener has specific voltage requirements, and your electrical system needs to match. Running an incompatible voltage damages the motor and creates fire risks.

    Circuit knowledge matters just as much. Understanding how series and parallel configurations work helps you connect everything correctly without overloading the system or creating short circuits. If circuits seem confusing, that’s a sign to bring in someone who handles this regularly.

    Wire sizing might seem like a minor detail, but it’s actually critical. Undersized wires overheat under load, and overheated wires start fires. Match the wire gauge to the current requirements listed in the opener’s specifications, this isn’t a place to guess or substitute what you have on hand.

    Safety Precautions and Gear

    Electrical work demands respect, and commercial garage door openers are no exception. Before starting any wiring, put on insulated gloves and safety glasses. Use your voltage tester to confirm power is actually off; don’t just flip the breaker and assume it’s off. Circuits get mislabeled, and assumptions get people hurt.

    Proper grounding prevents electrical hazards that might not show up until something goes wrong. Follow all manufacturer instructions and local building codes without shortcuts. Code requirements exist because inspectors have seen what happens when people skip steps.

    Installing a commercial garage door opener requires attention to detail and consistent adherence to safety protocols. The right gear and precautions significantly reduce accident risks and result in an installation that passes inspection the first time.

    Identifying Wires and Connections

    Commercial garage door opener installations involve multiple wires serving different functions, and mixing them up causes problems ranging from non-functional doors to electrical fires.

    Start by familiarizing yourself with standard color codes from the installation manual. Colors indicate specific functions, and manufacturers follow these conventions for good reason. As you work, label each wire with markers or tape, this saves headaches during troubleshooting down the road.

    Before powering anything up, compare your wiring connections against the manufacturer’s diagram. Errors at this stage cause malfunctions or safety hazards that are much harder to diagnose once everything is buttoned up.

    Following Manufacturer’s Guidelines

    The manufacturer’s guidelines exist because engineers tested these units extensively. These documents outline specific wiring instructions, safety requirements, and operational parameters that need to be followed precisely.

    Deviating from manufacturer recommendations doesn’t just void warranties; it compromises functionality and creates genuine safety risks. The guidelines reflect industry standards and lessons learned from installations that went wrong.

    By following the provided instructions carefully, you confirm that the installation is done correctly, and the opener will function efficiently for years.

    Testing and Inspection Processes

    After completing the wiring, thorough testing confirms everything works as intended. Use a multimeter to check voltage levels and verify they fall within the recommended range, voltages outside spec damage motors and shorten equipment life.

    Inspect all moving parts for wear, and lubricate components where the manual specifies. Smooth operation extends the lifespan of mechanical parts and reduces strain on the electrical system.

    Safety features require verification before calling the job complete. Test the auto-reverse mechanism by placing an obstruction in the door’s path, it should reverse immediately. Check that photo-eye sensors detect objects and stop the door appropriately. These features prevent injuries, and they’re required by code.


    Related Topics:

  • How to Install a Commercial Garage Door Opener for Maximum Efficiency

    How to Install a Commercial Garage Door Opener for Maximum Efficiency

    Installing a commercial garage door opener isn’t just about bolting hardware to a ceiling and calling it a day. The process requires thoughtful planning around size, weight, and how often that door will be cycling open and closed. Whether you’re handling the job yourself or working with Warwick’s reliable repair professionals, understanding each step helps you avoid costly mistakes down the road. This guide walks you through selecting the right opener, prepping your space, mounting the unit, wiring everything correctly, and keeping the system running smoothly for years to come.

    Choosing the Right Garage Door Opener

    Picking the right commercial garage door opener means matching the unit to your actual needs—not just grabbing whatever’s on sale. Think about the door’s size and weight, how many times per day it’ll be opening and closing, and what security features matter most to your operation. Heavy-duty applications call for a high-powered motor with enough horsepower to handle the workload without straining.

    Look for models with solid construction and dependable safety mechanisms that won’t quit on you mid-shift. You’ll also want to check compatibility with your existing garage door system and see what accessories are available if you need extras like remote monitoring, battery backup, or beefed-up security protocols. Taking time to weigh these factors helps you land on an opener that actually fits your situation.

    Preparing the Installation Site

    Getting the site ready before you start mounting anything saves headaches later. Clear out any junk, debris, or random stuff that’s going to get in your way during installation. Check your ceiling structure to confirm it can actually handle the opener’s weight and that you’ve got enough clearance for the unit to sit securely. Take a look at the electrical wiring in the area, too; you need to verify it meets the requirements for your specific opener model. Skipping these prep steps is how people end up with wobbly installations or electrical issues that could’ve been avoided with ten minutes of inspection upfront.

    Mounting the Garage Door Opener

    Start by positioning the opener in its designated spot. Make sure whatever surface you’re mounting to is structurally sound and can support the unit’s weight without sagging or shifting. Grab a level and confirm the opener sits correctly aligned before you mark your mounting holes.

    Secure the opener to the ceiling or wall with the right hardware, you want it firmly attached so it doesn’t vibrate loose during operation. Stick to the manufacturer’s instructions for your specific model since mounting requirements vary. Give everything a stability check before moving forward. Solid mounting is the foundation for safe, efficient operation.

    Wiring and Programming

    Now comes the technical part. Connect the power source to the opener according to the manufacturer’s directions, making sure all connections are secure and properly insulated. Wire up the control station, safety sensors, and any additional accessories using the wiring diagram that came with your unit. Test each connection for continuity and correct voltage levels before proceeding, this isn’t the step to rush through. Once wiring is squared away, program the opener by setting open and close limits, adjusting force settings, and syncing up any remote controls or keypads. Your user manual has the specific programming sequences and troubleshooting info if something’s acting weird.

    Testing and Adjusting

    With wiring and programming done, it’s time to make sure everything actually works. Test the door’s movement and watch for smooth operation without jerking or stalling. Check the balance by disconnecting the opener and manually lifting the door, it should stay open on its own.

    Adjust force settings so the door doesn’t slam shut with excessive power. Verify your safety features work properly by placing something in the door’s path while it’s closing to test the auto-reverse mechanism. Fine-tune the open and close limits until you get precise positioning. Inspect sensor alignment and tweak as needed for reliable performance.

    Maintenance Tips and Best Practices

    Regular maintenance is what separates openers that last a decade from ones that crap out in three years. Do visual inspections routinely to spot wear or damage on the opener, tracks, and cables before small problems become expensive ones. Tighten loose hardware and lubricate moving parts like hinges, rollers, and chains to keep everything running smoothly.

    Test safety features regularly, that auto-reverse mechanism exists to prevent accidents, so make sure it’s actually functional. Keep electrical components clean and dry to avoid malfunctions. Follow whatever maintenance schedule the manufacturer recommends and bring in a professional for servicing at least once a year. Staying on top of these basics extends your opener’s lifespan and keeps it running efficiently.


    Related Topics:

  • Easy Steps for Replacing the Battery in Your Garage Door Opener Keypad

    Easy Steps for Replacing the Battery in Your Garage Door Opener Keypad

    Replacing the battery in your garage door opener keypad is a simple task most homeowners can do with confidence. It’s a great way to keep things running smoothly between visits from garage door companies, who remain essential for more advanced repairs. All you need is a small Phillips screwdriver, a fresh 9-volt battery, and a clean cloth. This quick guide walks you through the steps from opening the compartment to testing the keypad. In just a few minutes, your keypad will be working perfectly again while it would stil be helpful to rely on garage door companies when it truly matters.

    Gather Your Tools

    Before you start, collect everything you need to complete the job smoothly. Grab a small Phillips-head screwdriver, typically a #1 or #2, to remove the screws on the keypad cover. Pick up a fresh 9-volt alkaline battery, which is the standard power source for most garage door opener keypads. Keep a clean cloth or alcohol wipes nearby to wipe away any dust or debris inside the battery compartment. A flashlight can help if the area around your keypad isn’t well lit. Having these tools ready before you begin makes the whole process faster and easier.

    Locate the Battery Compartment

    Find the battery section on your garage door opener keypad by checking the back or underside of the device. Look for a small cover or panel that houses the battery. The compartment is usually secured with screws or a sliding latch. Using a screwdriver or your fingers, depending on the design, carefully remove the screws or slide the latch to open the section. Inside, you’ll see the old battery that needs replacing. Pay attention to how the battery sits in the compartment so you can put the new one in correctly. The correct polarity is typically marked inside the compartment with plus and minus symbols.

    Remove the Old Battery

    Carefully remove the old battery to avoid damaging any internal components.

    1. Locate the battery compartment: Check the back or bottom of the keypad.
    2. Identify the battery orientation: Note the position of the positive (+) and negative (-) terminals before removing anything.
    3. Remove the battery: Push the battery gently from the compartment, applying even pressure to avoid bending or damaging the contacts.

    Insert the New Battery

    Place the new battery into the compartment with the positive and negative terminals correctly oriented. Check the markings inside the battery compartment to line up the terminals accurately. Slide the battery in gently, making sure it fits snugly. Once the battery is positioned correctly, close the compartment cover securely to prevent any shifting. Make sure the cover is tightly sealed so power flows without interruption. Give the keypad a gentle shake to confirm the battery doesn’t rattle or move. Remember to dispose of the old battery properly at a recycling center or designated drop-off location.

    Test the Keypad

    Confirm that your keypad works correctly after the battery replacement.

    1. Enter Code: Enter your usual access code on the keypad to verify that the numbers are entered correctly.
    2. Press Buttons: Press each button on the keypad to make sure they all respond with a click and feel secure.
    3. Test Garage Door: Input your code and press the “Enter” or “Open” button to verify that the garage door responds properly.

    Running these tests confirms that the keypad operates as expected with the new battery. If any issues persist, refer to the manufacturer’s instructions or consider replacing the keypad entirely.

    Secure the Battery Compartment

    After confirming the keypad works, reattach the battery compartment cover securely. Locate the battery cover on the back of the keypad and align it with the compartment opening. Slide it into place until it clicks shut. Make sure the cover sits flush with the keypad, with no gaps. Tighten the screws using a screwdriver to hold the cover in place. Keep the screws snug but don’t overtighten them since that can crack the plastic housing. Once the battery compartment is securely closed, test the keypad again to confirm everything functions properly. This final step protects the battery and keeps your garage door opener keypad running reliably for months to come.


    Related Topics: